Last Updated: November 4, 2026
Quick Summary
The best materials for custom laser engraving are birch plywood, hardwood, cast acrylic, anodized aluminum, powder-coated steel, genuine vegetable-tanned leather, glass, ceramic, and slate. Match each material to your laser type first, since CO2 and diode lasers handle substrates differently, and always run a test grid on scrap before a full batch.
- CO2 lasers handle wood, acrylic, glass, leather and coated metals; diode lasers struggle with clear acrylic and bare metal.
- Cast acrylic engraves to a frosty white contrast, while extruded sheets can look milky and inconsistent.
- Avoid PVC, vinyl, polycarbonate, ABS and polystyrene foam because they release corrosive, toxic fumes.
- Run a 3-by-3 grid of three power levels and three speed levels on scrap before each new substrate.
- Compare cost per finished piece using blanks consumed, machine minutes and finishing minutes, not price per sheet.
Table of Contents
- What Makes a Material Laser-Ready
- How Laser Type Changes Your Material Options
- Best Wood for Laser Engraving: Plywood, Hardwood, and MDF
- Acrylic and Plastic Sheets: Cast vs Extruded
- Metals and Coated Metals: Anodized Aluminum and Powder-Coated Steel
- Leather and Faux Leather: What Engraves Cleanly
- Glass and Ceramic Engraving: Etching and Marking
- Paper, Cardboard, and Uncommon Materials Worth Testing
- Laser Engraving Blanks: Choosing Pre-Cut Substrates
- Your Laser Safe Materials List: What to Avoid
- Material Testing Grids, Post-Processing, and Cost per Project
- Frequently Asked Questions
What Makes a Material Laser-Ready
A material is laser-ready when it absorbs the beam's energy predictably, produces clean contrast or depth, and releases no hazardous fumes during engraving. Three variables decide that outcome: the substrate's composition, the laser type, and how the surface responds to heat. Get those right and the best materials for custom laser engraving behave consistently from the first test piece to the two-hundredth.
Across different substrates, material choice often drives more failed projects than design mistakes do. Below, we break down what actually works, what to avoid, and how to test before you commit a full production run.
But first, here is what most guides get wrong. They list materials by popularity rather than by compatibility with your specific machine. A substrate that engraves beautifully on a CO2 laser can scorch or refuse to mark at all on a diode unit. That distinction matters more than any "top ten materials" ranking.
Laser engraving is the process of using a focused light beam to remove or carbonize a substrate's surface, creating permanent marks, contrast, or depth. The material must absorb enough energy to change visibly without melting, igniting, or emitting toxic fumes.
How Laser Type Changes Your Material Options
Your laser type narrows the material list before anything else does. CO2 lasers handle wood, acrylic, glass, leather, and coated metals well. Diode lasers excel on wood and dark plastics but struggle with clear acrylic and bare metal.
That single fact reshapes every recommendation in this guide. Before you buy blanks or promise a client a finish, confirm which laser will run the job. A material that is "laser-ready" on one machine may be entirely unsuitable on another.
Watch out: running a diode laser on clear acrylic or uncoated metal wastes time and blanks because the beam passes through or reflects rather than marking. Test a scrap piece before committing to a batch.
Best Wood for Laser Engraving: Plywood, Hardwood, and MDF
For most projects, birch plywood is a strong choice for laser engraving: it is dimensionally stable, takes crisp raster engraving, and holds contrast without heavy charring. Hardwoods like walnut and cherry deliver richer grain and darker marks. MDF engraves evenly but produces more dust and resinous smoke.
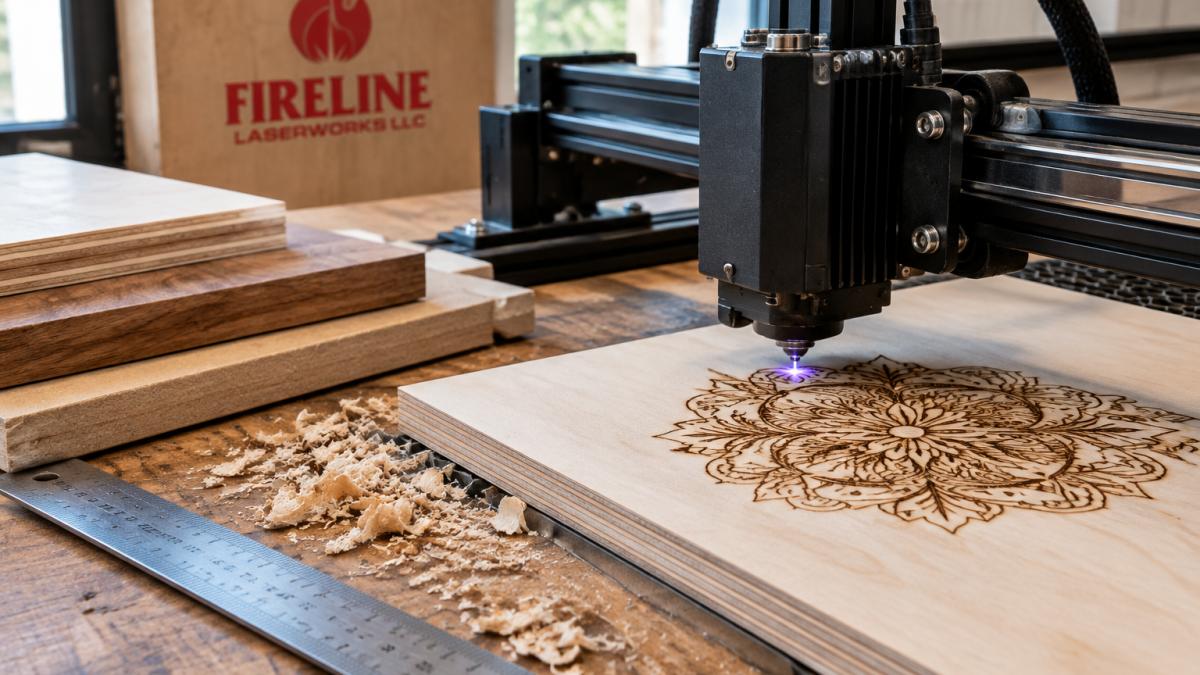
Here is how the three compare in practice:
| Wood | Engraving Quality | Watch Out For | Best For |
|---|---|---|---|
| Birch plywood | Crisp, high contrast | Glue voids in cheap sheets | Signs, boxes, awards |
| Hardwood | Rich grain, dark marks | Uneven density | Keepsakes, plaques |
| MDF | Even, consistent | Heavy dust, resin smoke | Painted prototypes |
A common mistake is buying the cheapest plywood available. Interior glue lines and voids can show up as patchy, inconsistent engraving.
Pros of wood: affordable, forgiving, excellent contrast, widely available in laser-ready thicknesses. Cons of wood: burns at high power, varies by sheet, and requires masking tape or transfer paper to control scorch marks.
Acrylic and Plastic Sheets: Cast vs Extruded
Cast acrylic generally engraves to a frosty white contrast, while extruded sheets are cheaper but can look milky and inconsistent when engraved.
The cast-versus-extruded distinction often matters to first-time buyers. Extruded acrylic is manufactured by pushing molten plastic through a die, while cast acrylic is poured and cured, giving it a uniform density.
You can see examples of custom engraving and design work in the portfolio samples of custom engraving and design work.
Pros of cast acrylic: bright frosted contrast, clean edges, holds detail. Cons of cast acrylic: costs more and can chip if mishandled.
Metals and Coated Metals: Anodized Aluminum and Powder-Coated Steel
Bare metals generally require a fiber laser or a marking compound, but coated metals behave differently. Anodized aluminum engraves to a bright, high-contrast mark because the beam removes the anodized layer and exposes the lighter metal beneath. Powder-coated stainless steel works the same way: the coating is removed to reveal the substrate.
Coatings are one reason coated metals are often used for drinkware and corporate gifts. Tumblers, pens, and promotional items in anodized or powder-coated finishes can hold up well to handling.
For teams sourcing engraved metal for recognition programs, the guide to choosing custom corporate gifts offers further planning considerations.
Watch out: uncoated or thinly coated metals can reflect the beam back into the machine. Confirm the coating type before running a batch.
Leather and Faux Leather: What Engraves Cleanly
Genuine leather engraves with a rich, dark, permanent mark and a slight raise at the edges. Faux leather, especially PVC-based material, is a different story: it can release chlorine-based fumes and is best avoided entirely. Stick to polyurethane faux leather or full-grain genuine leather.
The real difference between good and bad leather engraving comes down to tannage. Vegetable-tanned leather marks darkly and consistently; chrome-tanned leather can produce uneven, grayish results. Ask your supplier which process was used before you commit.
Pros of genuine leather: premium look, durable mark, ideal for portfolios and tags. Cons of genuine leather: natural variation means no two pieces engrave identically.
Glass and Ceramic Engraving: Etching and Marking
Glass and ceramic produce a frosted, permanent etch when marked with a CO2 laser. The beam creates micro-fractures in the surface rather than cutting, leaving a soft white contrast that reads well on drinkware, awards, and decorative tile. Thin glass can crack from thermal stress, so test power settings on scrap first.
Ceramic tile and slate are popular because they hold detail beautifully and suit everything from coasters to wall art. Slate in particular engraves with strong contrast and needs almost no post-processing.
Pros of glass and ceramic: elegant finish, weather-resistant, permanent. Cons of glass and ceramic: fragile, and glass demands careful power control to avoid cracking.
Paper, Cardboard, and Uncommon Materials Worth Testing
Paper and cardboard are the cheapest way to learn your machine, and they engrave fast enough that a mistake costs cents rather than a blank. The variables that matter are stock weight, coating, and fiber content. Standard 65 lb cardstock marks with a light tan contrast at low power; 110 lb cover stock holds a deeper, darker mark and resists burn-through on raster fills. Corrugated cardboard is best treated as a proofing substrate: it engraves and cuts quickly, but the flutes create uneven depth, so use it to dial in speed and power before moving to finished stock.
Coated papers are where beginners get burned. A glossy clay coating can blister or discolor under the beam, and some coated stocks contain plastic films that release fumes. Matte uncoated cardstock and kraft paper are the safe defaults. Thin tissue and newsprint burn through almost instantly and are not worth the setup time.
Beyond the obvious substrates, several uncommon materials reward testing on a scrap first:
| Material | What to Expect | Watch Out For |
|---|---|---|
| Cork | Soft, dark, slightly raised mark | Smolders; keep air assist on |
| Felt (wool or synthetic) | Fuzzy edges, low contrast | Synthetic felt can melt or fume |
| Bamboo | Crisp contrast, similar to hardwood | Glue lines in laminated boards |
| Slate | Strong white-on-black contrast | Dust; clean the bed after |
| Anodized aluminum tags | Bright mark, no compound needed | Only works on the anodized layer |
| Vegetable-tanned leather scrap | Dark, permanent mark | Chrome-tanned scrap gives gray results |
| Coated paper | Clean mark if matte | Glossy coatings blister |
A common pattern is that the only reliable test is your own machine. Every laser has its own power curve, and a setting that works on one unit may scorch on another. Build a small test grid before every new substrate, and keep the labeled scrap as a reference card for the next job.
Watch out: any paper or cardboard with an unknown coating, laminate, or plastic film should be treated as suspect until you have the manufacturer's composition data. A Material Safety Data Sheet (SDS) from the supplier is the fastest way to confirm whether a stock contains chlorine, fluorine, or other halogenated compounds that turn into corrosive fumes under the beam. If the supplier cannot produce an SDS, do not run the material.
Pros of paper and cardboard: cheapest way to test settings, fast engraving, widely available in consistent weights. Cons of paper and cardboard: thin stock burns through, coated stocks can fume, and results vary by fiber content.
Laser Engraving Blanks: Choosing Pre-Cut Substrates
Laser engraving blanks are pre-cut, pre-finished substrates sold ready for the beam: tumblers, cutting boards, wood boxes, coasters, pens, and keychains. Buying blanks saves prep time and gives you consistent thickness, which matters for focal length and repeatable results.
When selecting blanks, check three things: material thickness consistency, coating quality, and whether the surface is masked. A masked blank protects against scorch and cleans up faster. Inconsistent thickness forces you to re-focus between pieces, which slows production and introduces errors.
You can browse the Fireline Laserworks product catalog for available options.
Your Laser Safe Materials List: What to Avoid
The laser safe materials list is short and non-negotiable: avoid PVC and vinyl, polycarbonate, ABS, polystyrene foam, and any material containing chlorine or fluorine. These release corrosive, toxic fumes that damage both the machine and the operator's lungs.
Safety is not optional here. The OSHA guidance on laser hazards outlines the ventilation and fume-extraction controls that any engraving operation should have in place. Pair that with the NIOSH recommendations on engineering controls for airborne contaminants, and you have a baseline for a safe shop.
- PVC, vinyl, and faux leather containing PVC
- Polycarbonate and ABS plastics
- Polystyrene foam
- Any material with unknown or unlabeled composition
- Fiberglass and materials with chlorine or fluorine content
When in doubt, request the Material Safety Data Sheet from your supplier. If a substrate has no documentation and no known composition, do not put it under the beam.
Material Testing Grids, Post-Processing, and Cost per Project
A material testing grid is a small matrix of power and speed settings run on a scrap of each new substrate, so you can see exactly which combination produces the finish you want. The standard approach is a 3-by-3 grid: three power levels across the top, three speed levels down the side, each cell labeled with its settings. Run it on a scrap at least as large as your intended mark, photograph the result, and keep the labeled scrap in a binder or on a shop wall as a reference card. This one habit prevents most production failures, because it converts a guess into a recorded data point you can reuse on the next batch.
Post-processing is what separates a hobby mark from a finished product. The sequence that works on most substrates:
- Mask before engraving. Transfer paper or masking tape on wood, acrylic, and coated metal controls scorch and keeps soot off the surface. Peel it while the piece is still warm for the cleanest edge.
- Remove residue. A soft nylon brush lifts soot from wood grain and leather; a lint-free cloth with isopropyl alcohol cleans coated metals and acrylic without dulling the mark. Test any solvent on an inconspicuous spot first.
- Seal or finish. Wood benefits from a wipe-on polyurethane or beeswax finish that deepens contrast and protects the mark. Leather takes a neutral conditioner. Acrylic needs nothing beyond a clean edge, though a flame-polish pass on cut edges is common in signage shops.
- Paint for contrast when needed. On woods with low natural contrast, a light coat of acrylic paint worked into the engraved recess and wiped off the surface leaves the mark filled and crisp. This is standard practice for signage and awards.
On cost per project, the useful comparison for a small shop is not price per sheet but cost per finished piece, which folds in material yield, engraving time, and finishing labor. A cheaper plywood with voids wastes more blanks than a uniform sheet costs extra. A cast acrylic offcut that engraves cleanly on the first pass beats a cheaper extruded sheet that needs two attempts. Track three numbers per material: blanks consumed per good piece, minutes of machine time, and minutes of finishing. The material with the lowest total usually wins, even when its sticker price is higher. Because those numbers depend on your design, thickness, and quantity, pricing varies by job. For current pricing or a quote, tell us what you want to make.
Watch out: skipping the test grid on a new substrate is the most common cause of a ruined production run, and skipping the SDS check on an unfamiliar material is the most common cause of a fume event. Both take minutes; both save blanks and lungs.
The Laser Institute of America resources offer further guidance on safe operating practice and material handling if you want to go deeper.
Frequently Asked Questions
What is the best material for laser engraving?
There is no single best material, but birch plywood and cast acrylic are the most forgiving for beginners because they engrave with high contrast and minimal odor. Anodized aluminum is the top choice for permanent metal marking, while leather and glass suit keepsakes and awards. The right pick depends on the intended use, budget, and whether the piece will be handled or displayed outdoors.
Which materials should never be laser engraved due to safety risks?
Never engrave PVC, vinyl, polycarbonate, or any plastic containing chlorine or fluorine. These release hydrogen chloride and other toxic fumes that corrode the machine and harm operators. Avoid fiberglass, carbon fiber, and epoxy resins for the same reason. Check the Material Safety Data Sheet before running any unfamiliar substrate, and always run fume extraction to the outside.
How does material density affect laser engraving quality?
Denser materials generally produce finer detail but require slower speeds or higher power. MDF engraves with uniform contrast because its density is consistent, while natural hardwood varies grain to grain, so results can shift across a single board. Cast acrylic holds detail better than extruded acrylic. Run a small test grid on each new batch to dial in power and speed before committing to a full production run.
Is there a difference between laser-ready wood and standard lumber?
Laser-ready wood is kiln-dried, sanded flat, and free of knots, pitch pockets, and fillers that can char or gum up during engraving. Standard lumber often has moisture variation and resin that cause uneven burning and inconsistent contrast. For awards and signage, specify laser-ready blanks. For rustic pieces, standard lumber can work if you test each board and accept natural grain variation.
What are the best metals for permanent laser marking?
Anodized aluminum and powder-coated stainless steel give the most durable, high-contrast marks. On anodized aluminum, the laser removes the anodized layer to reveal the lighter metal beneath, creating a permanent white or gray mark. Powder-coated steel works the same way, exposing bare metal through the coating. Bare brass and copper mark well with fiber lasers but require higher power and produce less contrast.
What laser-engraved items sell best for small e-commerce sellers?
Drinkware, cutting boards, leather patches, keychains, and slate coasters are consistent sellers because they are useful, photograph well, and accept crisp engraving. Personalized wedding and anniversary gifts, such as engraved glassware and wood frames, are another popular category. Testing each new blank batch before listing it is a sound practice.
